
Snow Family Ornament Pattern
by Elizabeth Mareno
An ad-free version is also available on ETSY or my website.


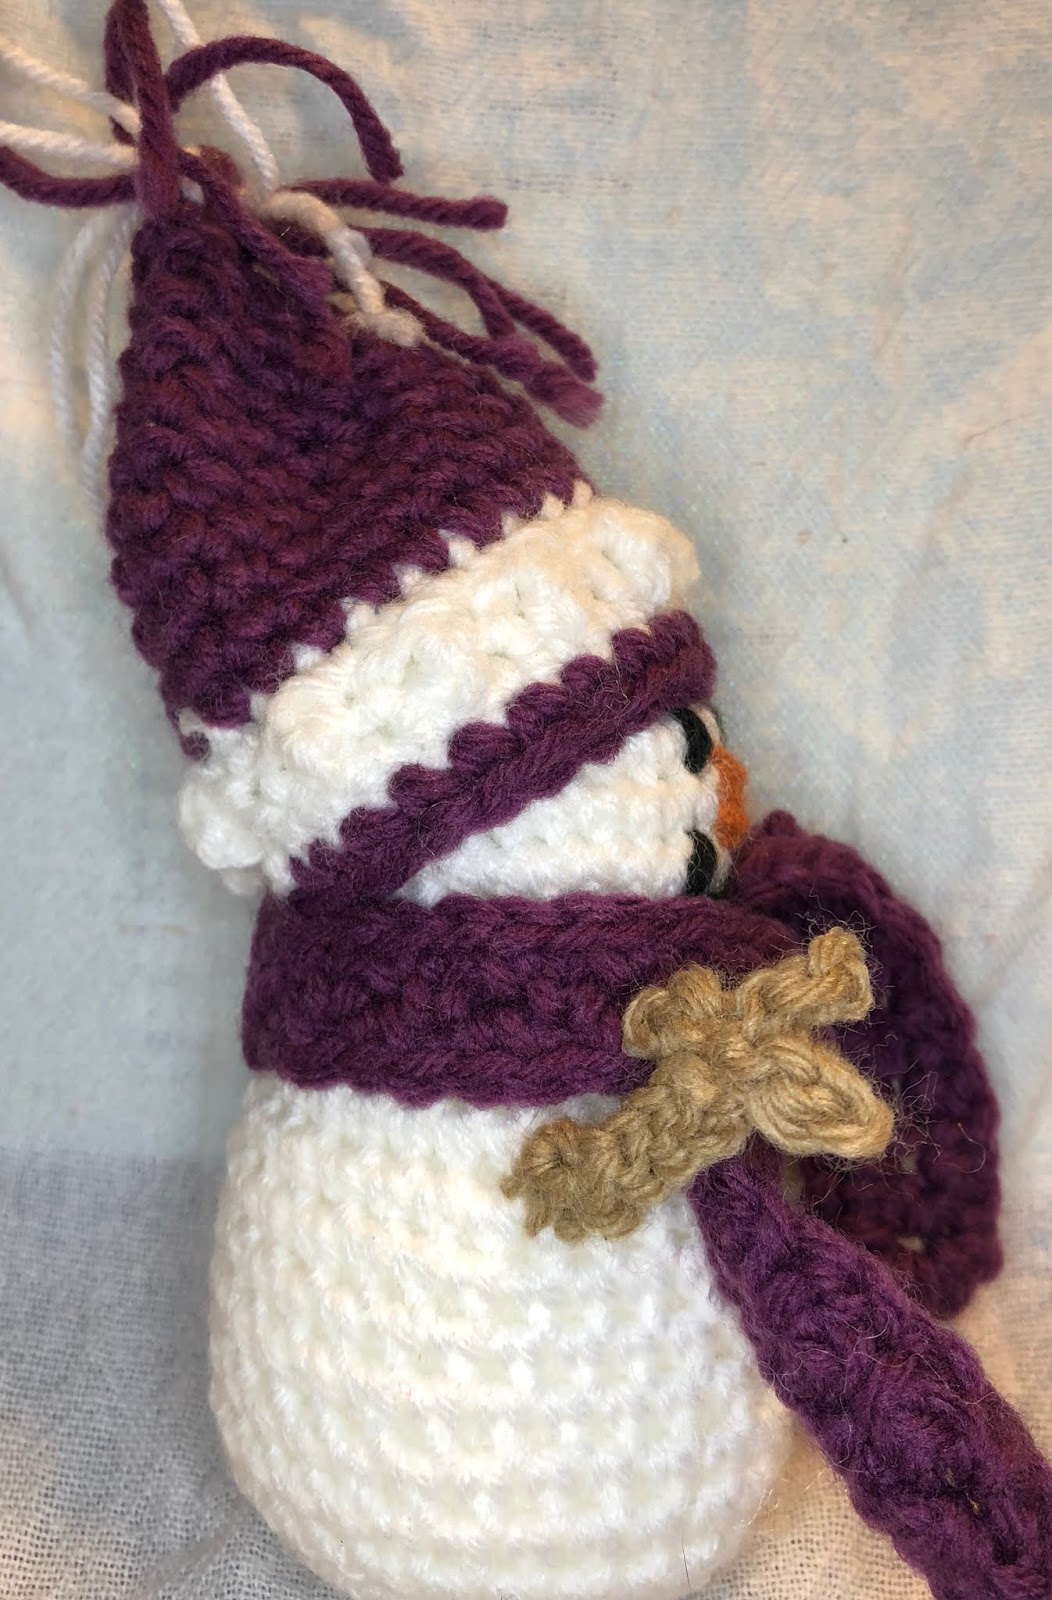
The snow people range from 3" to 4" tall
The Snow Family came about on a Winter trip from Florida to Michigan right around Christmas time. I made one snowperson to represent each one of us in colors that represented each person.
They are the perfect size to make a cute arrangement on a Holiday table, or you can add a loop and make them into ornaments! You can even change up your yarn and hook sizes and make them into larger amigurumi for gifts. I recommend using these to stash bust your way through the Holidays!!
#3 Light yarn, DK weight or baby weight yarn
White and various colors- Approx 2 oz for the white (family of 5)- scraps for the rest
F Hook
Needle for assembly
Polyfil

R1- MR, 6sc
R2- 2sc in each sc around (12sc)
R3- (sc in 1, 2sc in next) around (18sc)
R4- (sc in 2, 2sc in next) around (24sc)
R5- (sc in 3, 2sc in next) around (30sc)
R6- (sc in 4, 2sc in next) around (36sc)
R7-11- sc in each
R12- (sc in 4, sc dec) around (30sc)
R13- (sc in 1, sc dec) around (20sc) STUFF
R14- sc dec around (10sc)
R15- 2sc in each around (20sc)
R16- (sc in 1, 2sc in next) around (30sc)
R17- (sc in 4, 2sc in next) around (36sc)
R18-27- sc in each
R28- (sc in 4, sc dec) around (30)
R29- (sc in 3, sc dec) around (24)
R30- (sc in 2, sc dec) around (18)
R31- (sc in 1, sc dec) around STUFF (12)
R32- sc dec around (6)
Cut, close up the hole, weave in end.

R1- MR, 6sc
R2- 2sc in each around (12sc)
R3- (sc in 1sc, 2sc in next) around (18)
R4- (sc in 2sc, 2sc in next) around (24)
R5- (sc in 3sc, 2sc in next) around (30)
R6-9- sc in each
R10- (sc in 3sc, sc dec) around (24) STUFF
R11- sc dec (12)
R12- 2sc in each around (24)
R13- (sc in 3sc, 2sc in next) around (30)
R14-21- sc in each
R22- (sc in 3sc, sc dec) around (24)
R23- (sc in 2sc, sc dec) around (18)
R24- (sc in 1sc, sc dec) around STUFF (12)
R25- sc dec around (6)
Cut, close up the hole, weave in ends
NOTE: It might be helpful to embroider the faces before applying the hats. It helps with placement.

Arm and finger 1- ch9, sl st in 3rd ch from hook and next.
finger 2- ch4, sl st in 3rd ch from hook and next
finger 3- ch4, sl st in 3rd ch from hook and next
Finish arm- sl st to ch4 from original finger and rem 5 ch’s.


Scarf:
1- ch70, sc in 2nd ch from hook, (ch1, sk1, sc in next) across
2- ch1, turn, sc in first sc and ch1, (ch1, sk sc, sc in ch1) across, sc in last sc.
3sc in row end, *working on the opposite side of the starting chain* sc in first sc and ch1 sp, repeat from the ch1, sk1, sc in ch1 pattern, 3sc in row end.
Finish off.


Top Hat:
R1- MR, 6sc (6)
R2- 2sc in each around (12)
R3- (sc in 1sc, 2sc in next) around (18)
R4- BLO, sc in each
R5-7- in both loops, sc in each
R8- FLO, 2sc in each (36)
R9- (sc in 2sc, 2sc in next) around
Cut.
Sl st a band of color as a “hat band” right above the brim
With main hat color, sl st in the open loops of row 4.
Tack to the top of the head on a jaunty angle.


Ear Muffs- make 2:
R1- MR, 6sc
R2- 2sc in each (12)
R3- (sc in 1sc, 2sc in next) around (18)
R4- sc in each around
R5- (sc in 1sc, sc dec) around (12)
R6- sc dec around (6)
Finish off. Flatten and sew to the side of the head.
With black, ch18, sl st in 2nd ch from the hook and each across. Tack to the head behind the muffs.


Stocking Cap:
R1- ch19, sl st in 2nd ch from hook and next 4, sc in rem 13 ch
R2 and all even rows- BLO, ch1, turn, sc in 14, sl st in last 5.
R3 and all odd rows- BLO, ch1, turn, sl st in 5, sc in last 13.
Repeat rows 2&3 until you reach 23 rows. Cut yarn, leaving a long end for sewing.
Whipstitch edge together. Make a pom-pom and attach. Flip the brim and tack the hat to the head.

Santa Hat:
with white first
R1- ch24, join, ch1, sc in each ch
R2- ch1, turn, (sc, trc) around
R3- ch1, turn, sc
Change color
R4-10- ch1, sc in each sc. Join.
R11- ch1, (sc in 2sc, sc dec) around. Join.
R12- ch1, sc, join.
R13- ch1, (sc in 1sc, sc dec) around. Join.
R14- ch1, sc in each, join.
R15- ch1, sc dec around.
Sc a row around the base of the white in the main hat color.

Ear Flap Hat:
R1- MR, 6sc
R2- 2sc in each around (12)
R3- (sc in 1sc, 2sc in next) around (18)
R4- (sc in 2sc, 2sc in next) around (24)
R5- (sc in 3sc, 2sc in next) around (30)
R6-9- sc in each.
R10- sl st in 9, ch1, sc in 9th st and the next 6 st. (7)

First ear flap- leave the remaining stitches unworked. You will be working back and forth.
R11- ch1, turn, sc dec, sc in 3, sc dec in last 2. (5)
R12- ch1, turn, sc in 5
R13- ch1, turn, sc dec, sc in 1, sc dec in last 2 (3)
R14- ch1, turn, 3scdec . (1)
Cut, and leave an end for weaving in.

Second ear flap- sk 8 on R9, reattach with a sl st to the next sc in the row.
R10- ch1, sc in join and next 6sc.
R11-14- repeat as for first flap
Weave in flap ends.

Skipping the 8 st you sl st in to make First ear flap, rejoin with a sl st to the sp occupied by the first sc of First ear flap on R10. Sc in each row end to the tip, ch5, sc in 2nd ch and next 3, sc in tip again, sc down the remaining side and into the same sp as the last sc from R10.
Sc in the 8 sk st from R9 to the other flap. Sc in same sp as the first sc from Second ear flap.
Repeat as for the First flap. Sl st in the same sp as the last sc from Second ear flap.
The pin marks the front of the hat.
© Bizzy Crochet and Design 2017

.png)

These are adorable. What a fun project.
ReplyDelete