Monday, December 31, 2012

Owl Pillows in Two Sizes: Last Pattern for 2012!

My last pattern for the year 2012 just happens to be Owl Pillows! :) This house has been on an owl craze for a month or two. The daughter is infatuated with them. I have to admit, they are pretty cute! I had someone request an owl pillow and I thought it would be a good opportunity to see what kind of pattern I could come up with, since I couldn't find what I liked on the web. 

Here is what I have to offer you:

 
It is a free pattern (Ravelry download), so I hope you enjoy! :)

The color combinations are endless because they use up scraps. I bought a variety pack of colorful buttons over the Holidays and decided to use those as eyes. You can really use anything that strikes your fancy! Just remember to err on the side of caution when making these for little ones. We don't want anyone choking!

Happy Crocheting!


Saturday, November 10, 2012

Beatrice the Pteradactyl

Beatrice, the Pteradactyl, is the second in my series of dinosaur patterns (even though she's not technically a dinosaur). Her pattern is a Ravelry Download. To continue my birthday month celebration, her pattern will be free November 10th to November 17th (2012). After that, her pattern will be $2.99.
I can just imagine a whole family of "Beatrice's" in a rainbow of colors. She would make a GREAT stash buster!! Her finished size is 8-1/4" tall with a 10-1/2" wing span.

Beatrice would also make a wonderful friend to put in your bag of charity toys at Christmas time. She just wants somebody to love. :)

Sunday, November 04, 2012

Zen Baby Hat Pattern

The Zen Baby Hat pattern is participating in the 
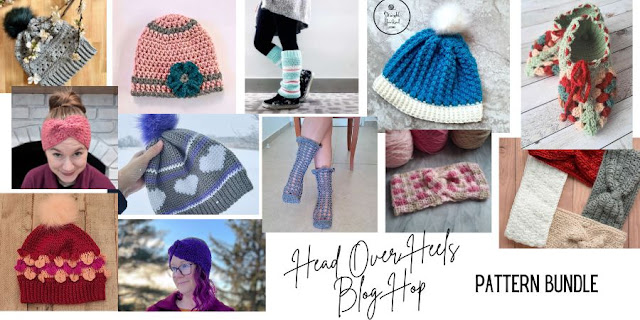
2025 Head Over Heels Blog Hop running from February 10 to February 24!


This fabulous Hop has been organized by our good friend, Debbie, of MadameStitch.
There will be 24 patterns available (up to 2 per day) starting February 10th. 
Each pattern will be a free download for 24 hours.

Visit the Roundup Post to get today's (Feb 11) coupon code for the Zen Baby Hat.

Then click below to go get your free download on Ravelry!


If you would rather not wait for each pattern to be released- you can pick up the awesome bundle created by Debbie so you can have every pattern now and in one convenient location! 
$13.99 for 24 patterns. 
Thank you if you use my affiliate link below!


Find Your Crochet Zen with the Zen Baby Hat

Looking for a baby hat that’s as peaceful to make as it is adorable to wear? The Zen Baby Hat is all about simplicity, relaxation, and effortless style. With clean lines, a classic shape, and a delicate flower embellishment, this design is perfect for crocheters who love a soothing project with a touch of charm.

Made with worsted weight yarn, this hat works up quickly and is available in three sizes, with extra tips on how to personalize the fit. Whether you’re stitching up a sweet baby shower gift or making something special for a little one in your life, the Zen Baby Hat is a delightful project to unwind with.

The best part? You can use the free pattern on the blog, or if you prefer an easy-to-print version, the PDF upgrade is available too! So, gather your yarn, find your happy place, and let’s crochet some Zen!


Saturday, November 03, 2012

Meet Bert the Triceratops!

Bert is my newest toy pattern! November is my birthday month (like my birthday decorations?) and I have decided that I am going to celebrate my birthday month by giving away more patterns! Bert is the first of a series of dinosaur patterns that I have come up with. He is a FREE Ravelry Download from November 3rd to November 10th, 2012. After that, his pattern will be available in my Ravelry and Etsy stores for $2.99. Get him FREE while you can....don't waste any time!!
Because Bert is eventually going to end up being a purchased pattern, there are no restrictions put on your ability to sell the items you make from this pattern! Even if you got it for FREE! :)
Bert works up fast and easy. He is what I would consider a good beginner's pattern for someone just getting into Amigurumi. Not too many pieces and he's simple to put together.
Hope you enjoy making Bert as much as I did!

Wednesday, October 10, 2012

Family Time

 We enjoyed a few hours at the beach recently. We gathered some shells and enjoyed the lovely breeze. The weather has finally cooled down to a reasonable temperature. We have had the house open for the last three days and I LOVE IT!
My baby man, Teo, turned 16 in September. We had fun decorating and being silly for his birthday. We bought a whole bunch of Avengers decorations and put up streamers and a Happy Birthday banner. He asked for brownies for his birthday 'cake', so I made some super fudgy ones. He got a kick out of his goodies. :) Then we celebrated at Steak N Shake (his choice) and went to see Batman: The Dark Knight Rises. That was a wonderful end to that series. It left openings for certain story lines to be continued, and completed the Batman trilogy on a tremendously hopeful note. We are pretty geeky in this house, so those things matter to us. LOL.

Catherine's Wheel Afghan

I just had to share my latest obsession with you. It's called Catherine's Wheel Square or Wool-Eater Stitch or Bavarian Stitch. I learned it by watching Crochet Geek's YouTube Tutorial. She did a fabulous job at teaching the stitch. 

The video is only 26 minutes long, so it's a short, but worthy investment!


I highly recommend that you learn the stitch. It lives up to its name and becomes a bit of a wool eater when you get about 20" wide. I finished my lap afghan at 36"x36" and it was taking about a 1/2 skein of yarn to finish one color strip. I adore this pattern and I will be making many more. I'm thinking about trying it without the square accent and see how that turns out. :) Should be fun!

Endangered Baby Animals and Iceberg Toy Bag

Endangered Baby Animals and Iceberg Toy Bag Pattern

© 2012 Bizzy Crochet Designs

Iceberg Bag- (it does have a handle)

The Iceberg toy bag has four, special endangered baby animals that live inside!

#1- Baby Polar Bear named Albert
Baby Albert's Bum

#2- Baby Harp Seal named Dewey

#3- Baby Emperor Penguin named Smudge

#4- Baby Orca named Earl

Materials Needed: 
Yarn: All amounts are approx. Actual amounts will depend on your gauge. 
for Iceberg Bag- 
2 oz Medium Blue (Used Red Heart Super Saver- Country Blue) 
4-5 oz White (Used Hobby Lobby “I Love This Yarn”- White I would recommend using something stiffer as the Hobby Lobby doesn’t hold its shape well enough for this purpose) 
for Baby Polar Bear- 
1 oz White (Used Caron Simply Soft- White) small bits black for face 
for Baby Seal- 
1 oz White (Used Caron Simply Soft- White) small bits black for face 
for Baby Orca- 1 oz Black (Used Caron Simply Soft- Black) small bit of white for tummy and face for Baby Penguin- 1 oz Gray (Used Hobby Lobby “I Love This Yarn”- Grey Mist) small bits black and white for face and tail 
F & H hooks (stitch marker if desired) 
Polyester Fiberfill 
Large Eye needle for assembly  
7/8” Button (Used retro, plastic, faceted button) 

Gauge:  w/H hook & RH yarn- 7 rows x 7 sc= 2” x 2” w/F hook & Caron yarn- 5 rows x 5sc= 1” x 1” 

Special Stitch Directions: 
Spikes: sc in space indicated, ch3, sl st in 2nd ch, sc in next ch, sc in next space 

Dtrc Cluster: (yo 3x, insert hook into sp, yo, pull through sp, {yo, pull through 2 loops} three times leaving last hook on loop) Repeat this a total of 5 times, yo, pull through 6 loops on hook. Chain 1.

Dc Cluster: (yo, insert hook into sp, yo, pull through sp and 2 loops) a total of three times. Yo, pull through all four loops on hook. Chain 1. 

Pattern:

Iceberg Bag Bottom: 
with Blue and H hook mark beginning of each row to keep track
R1- ch2, 6sc in 2nd ch from hook. (6) 
R2- 2sc in each (12) 
R3- (sc in 1, 2sc in next) rpt (18) 
R4- (sc in 2, 2sc in next) rpt (24) 
R5- (sc in 3, 2sc in next) rpt (30) 
R6- (sc in 4, 2sc in next) rpt (36) 
R7- (sc in 5, 2sc in next) rpt (42) 
R8- (sc in 6, 2sc in next) rpt (48) 
R9- (sc in 7, 2sc in next) rpt (54) 
R10- (sc in 8, 2sc in next) rpt (60)
R11- (sc in 9, 2sc in next) rpt (66) 
R12- (sc in 10, 2sc in next) rpt (72) 
R13- BLO, sc in each sc  
R14-15- in both loops, sc in each. 
Join after R15 R16- turn, BLO, (sl st in 3sc, sc in next, hdc in 2sc, dc in 3sc, hdc in 2sc, sc in next) repeat 5 more times. Join. (6 waves)    
R17- ch1, turn, in open loops of R15, sc in each.  DO NOT JOIN.  
R18-19- in both loops, sc in each. Join after R19 R20- ch3(not dc), turn, BLO (dc in 3sc, hdc in 2sc, sc in next, sl st in 3sc, sc in next, hdc in 2sc) repeat 5 more times. Join. (6waves) 
CUT- WEAVE END R21- rejoin in open loops, ch1, sc in join and each open loop around. Join. R22- BLO- (sc in 10, sc dec) rpt, join.(66) 
R23- both loops, (sc in 9, sc dec) rpt, join (60) 
R24-32- continue decreasing in established pattern until 6sc remain. Join each row. Stuff as you go. Finish off and weave ends at the end of R32. (Optional Tip: You can cut a piece of plastic canvas to fit inside on the bottom for stability. Make sure to put in place before stuffing.)

Iceberg Bag Top: 
with White and H hook 
R1- ch2, 5sc in 2nd ch from hook (5) 
R2- sc in each 
R3- 2sc in each (10) 
R4- sc in each 
R5- (sc in 1, 2sc in next) rpt (15) 
R6- sc in each 
R7- FLO- sc in each sc, randomly placing 3 spikes (*see specialty stitches). 
Tip: Marking the first back loop will help you know where the next row begins! 
R8- working in open loops behind 
R7- (hdc in 1sc, 2hdc in next) rpt (23) 
R9- FLO- working in hdc, sc in each, randomly placing spikes. 
R10-R13- Repeat Rows 8+9 twice. (46 hdc after R12) 
Tip: As the rows get bigger, increase the amount of spikes per row- use your personal preference! R14- Repeat R8, but DON’T INCREASE- Just 1 hdc in each. (46) 
R15- Repeat R9 
R16-19- Repeat Rows 14+15 twice.  
R20- Repeating R8, but INCREASE with (hdc in 2sc, 2hdc in next) rpt. (61hdc) 
R21- Repeat R15 
R22-25- Repeat Rows 14+15 twice. 
R26- Repeat R8, but INCREASE with (hdc in 3sc, 2hdc in next) rpt. (76hdc) R27- Repeat R15 R28-29- Repeat Rows 14+15 once. STARTING CAVE DOOR 
R30- ch1, turn, work in open loops, hdc in 73, leave remaining unworked.
 R31- ch1, turn, FLO- Repeat R9.  
Tip: Make sure you don’t work into the back ridge of the hdc from the row before. 
R32- ch1, turn, working in open loops, hdc dec, hdc to the last 2, hdc dec (71) 
R33- ch1, turn, repeat Row 31 
R34-35- Repeat Rows 32+33 once. (69) 
R36- Repeat 32 once more. (67) 
ASSEMBLY-with Iceberg sitting on top of the water- sc into open loops from R21/22 of bottom and (when needed) into open loops AND both loops of R36 of top. Sc in 5 “open loops” for cave door, then match the remaining 67 open loops with hdc from R36 and sc through all loops.

Iceberg Cave Door: 
with White and H hook
R1- ch10, sc in 2nd ch from hook and next 7, 3sc in the last ch, working the opposite side of the beginning ch, sc to the end. (19) 
R2- ch1, turn, BLO, sc in 9, 3sc in next, sc in 9. (21) 
R3- ch1, turn, BLO, sc in 10, 3sc in next, sc in 10. (23) 
R4- (RS) ch1, turn, BLO, sc in 11, 10sc in next (button loop), sc in 11. (25) 
Sc across row ends to finish. With RS facing out sew flat edge to bottom. Place and sew on button.

Iceberg Handle: 
with White and H hook
R1- ch6, sc in 2nd hook and each (5) 
R2-40- ch1, turn, sc in each To finish, sc down both sides of row ends 
Attach to the back part of the iceberg, placing the ends so that it hangs straight and even when held.


"Albert”- Baby Polar Bear Body: with White and F hook 

R1- ch2, 6sc in 2nd ch from hook (6) 
R2- 2sc in each (12) 
R3- (sc in 1, 2sc in next) rpt (18) 
R4- (sc in 2, 2sc in next) rpt (24) 
R5- (sc in 3, 2sc in next) rpt (30) 
R6-10- sc in each R11- (sc in 3, dec) rpt (24) 
R12-(sc in 2, dec) rpt (18) 
R13- (sc in 1, dec) rpt (12) STUFF 
R14- (dec) rpt (6) Cut, Weave ends. 

“Albert’s” Head: with White and F hook
R1-3- Repeat body 
R4-6- sc in each 
R7- Repeat R13 of body 
Cut, Stuff, Sew on- centered to body.

“Albert’s” Nose: with White and F hook
R1- ch2, 6sc in 2nd ch from hook (6) 
R2- sc Embroider nose and mouth with black (and eyes after nose is in place) 
Sew to head- centered. 

“Albert’s” Ears: with White and F hook
With Albert facing you, on one side of his head, attach with a sl st around the post of a sc. Ch2, dc around the same post and sl st around the next post over. Cut and weave in your ends.  Evenly spaced on the other side of the head- rpt for 2nd ear.

“Albert’s” Legs: with White and F hook
R1- ch2, 8sc in 2nd ch (8) R2- sc in each R3- dec, sc in remaining (7) R4- sc in each Cut, leave a long end for attaching. Sew to body. DO NOT STUFF.
 
“Albert’s” Tail: with White and F hook
With Albert’s butt facing away from you and his head pointing down, attach with a sl st around a post on his butt. 2sc around same post, sc around next post, sl st around next post. Cut and weave in the ends.  


 “Dewey” Baby Seal Body: with White and F hook 

R1-5- Repeat Polar Bear 
R6-7- sc in each  
R8- (sc in 3, dec) rpt (24) 
R9-11- sc in each 
R12- (sc in 2, dec) rpt (18) 
R13- sc in each 
R14- (sc in 1, dec) rpt (12)STUFF! 
Tip: Make sure you stuff to desired firmness! 
R15- Flatten stitches on R14 to each other, work through both thicknesses, ch1, insert hook into 1st sc on R15 AND last sc on R14, sc. Continue to work 5 more sc across row. Do Not CUT! Turn. 

Flipper #1- (RS) ch 4, Dtrc Cluster (*see specialty stitches), Cut. Weave ends. 
Flipper #2- sk 4sc, attach to last sc w/sl st, repeat Flipper #1, Cut. Weave ends. 

“Dewey’s” Head: 
with White and F hook 
R1-6- Repeat Polar Bear 
Cut. Sew to body, angled according to picture.

“Dewey’s” Nose: 
with White and F hook
R1- ch2, 6sc in 2nd ch R2- (sc in 1, 2sc in next) rpt (9) 
Cut, embroider, and sew on. Finish with face embroidery. 

“Dewey’s” Front Flippers: 
with White and F hook- Repeat for Flipper #1 & #2. 
Position them equally spaced in the front. 
Have the seal’s head and back facing you when you put them on. 


“Earl” Baby Orca Body: 
with Black and F hook
Starting at the tip of the tail 
R1- ch2, 4sc in 2nd ch from hook (4) 
R2- sc in each *make sure you pop your work to the right side 
R3- (sc in 1sc, 2sc in next) rpt (6) 
R4- sc in each 
R5-Repeat R3 for (9) 
R6- sc in each 
R7- Repeat R3, sc in last for (13) 
R8- (sc in 2sc, 2sc in next) rpt, sc in last (17) 
R9- (sc in 3sc, 2sc in next) rpt, sc in last (21) 
R10-14- sc in each 
R15- (sc in 3sc, dec) rpt, sc in last (17) 
R16- sc in each 
R17- sc in 4sc, dec, sc in 7sc, dec, sc in 2sc (15) 
R18- sc in each 
R19- sc dec 3x, sc in 7sc, dec, sc in last (12) 
R20- sc dc twice, sc in 5sc, dec (8) 
R21- dec, sc in 4, dec (6) Cut. 
Very carefully sew his nose shut, flattening it oblong from side to side.

“Earl’s” Underbelly: 
with White and F hook
R1- ch3, sc in 2nd and next (2) 
R2- ch1, turn, 2sc in each (4) 
R3- ch1, turn, 2sc in first, sc in each, 2sc in last (6) 
R4- 14- ch1, turn,sc in each 
R15- ch1, turn, dec, sc in 2, dec (4) 
R16- ch1, turn, sc dec twice (2) 
R17- ch1, turn, sc dec (1) 
R18-20- ch1, turn, sc. 
Cut, sew to underside making sure R’s 18-20 are on the tail.

“Earl’s” Tail Fin:  
with Black and F hook 
Make 2 fins and sew them together halfway, leaving an opening for the tail tip to sit between them. R1- ch7, sc in 2nd ch from hook and next ch, hdc in 2ch, dc in 2ch. (6) 
R2- ch1, turn, sc in 3, sl st in 3.  
Cut, sew together and sew to tail tip.

“Earl’s” Dorsal (1) and Side Fins (2): 
with Black and F hook 
Ch6, sc in 2nd ch, hdc in 2ch, dc in 2ch. 
Cut, sew to back and sides. 

“Earls” White Face Patches (2): 
with White and F hook ch4, sl st in 2nd ch and next 2. Sew on. 


“Smudge” Baby Penguin Body: with Gray and F hook 
R1- ch2, 5sc in 2nd ch from hook (5) 
R2- 2sc in each (10) 
R3- (sc in 1, 2sc in next) rpt (15) 
R4- (sc in 2, 2sc in next) rpt (20) 
R5- sc in each 
R6- (sc in 3, 2sc in next) rpt (25) 
R7-9- sc in each 
R10- (sc in 3, dec) rpt (20) 
R11- sc in each 
R12- (sc in 2, dec) rpt (15)  
R13- sc in each
R14- (sc in 1, dec) rpt (10) STUFF! 
R15- sc in each 
R16- (dec) rpt (5) 
Cut and close up 

“Smudge’s” Head: with Gray and F hook 
R1-3- Repeat Body 
R4-6- sc in each. 
Cut. 

“Smudge’s” Face: 
with Black and F hook 
R1- ch5, sc in 2nd ch from hook and next 2, 3sc in last, working the opposite side of the original ch, sc in 2, 2sc in last. Join. (10) 
R2- ch1, 2sc in join sp, sc in 2sc, 2sc in next 3sc, sc in 2sc, 2sc in next 2sc. Join (16) 
R3- ch1, sc in join, hdc in 4sc, sc in next sc. Join. Leave rem unworked. 
Cut. Sew to Head. 


“Smudge’s” Eyes: 
with White and F hook 
R1- ch2, 6sc in 2nd ch from hook, don’t join or cut 
R2- ch3, 6sc in 2nd ch from hook, sl st in next. Join to 1st “circle”.  Cut and sew to face. 

“Smudge’s” Beak: 
with Black and F hook 
Attach black around post between “eyes”- ch3, sl st in 2nd ch and next. Join. Cut and weave ends. 

“Smudge’s” Wings: 
Make 2 with Gray and F hook 
Ch10- sc in 2nd ch and next 3chs, 2sc in next ch, sc in last 4 chs. 
Cut, sew on to side of body with angle towards the front.

“Smudge’s” Tail: with Black and F hook
R1- ch2, 4sc in 2nd ch from hook (4) 
R2- sc in each 
Tip: Pull right side of work out of “hole” 
R3- (sc in 1, 2sc in next) rpt (6) 
R4- Repeat R3 for (9) 
Cut, sew to butt

“Smudge’s” Feet: with Black and F hook -Hold Smudge front facing, upside down and attach black around a post towards the under part of his body. Ch2, Dc Cluster (*see specialty stitches). 
Repeat evenly spaced for the 2nd foot.


Friday, September 21, 2012

Reversible Tiers Hat - Crochet

 I made another new hat pattern this week! Yay!!


I used Vickie Howell's Sheep(ish) and an H hook. 
It's fast, simple and works you through some fpdc and bpdc practice.
Instructions are included for figuring out custom sizes.


Monday, September 17, 2012

Easy Sweet & Sour Chicken- Crockpot


Easy Sweet/Sour Crockpot Chicken:

1-1/2 lbs frozen chicken tenderloins
1 can pineapple rings or chunks
1 rough chopped green pepper
1/4 cup soy sauce
1/2 Tbs minced ginger (or a heaping tsp)
1-2 tsp minced garlic
1/4 cup brown sugar

Cook frozen chicken and pineapple with juice for two hours on high.

Mix soy, ginger and garlic together.

Add pepper, soy mix and sugar to chicken. Mix in and cook another 2 hours.

Remove chicken and pineapple/pepper chunks.

Make gravy out of juice left in crock pot. (I use corn starch & water)

Cut chicken up. Add everything back to crockpot. Serve over rice. Salt to taste.

Friday, September 14, 2012

Acorn Bag & Forest Friends Pattern

Acorn Bag & Forest Friends Toy Bag 

by Elizabeth Mareno

This pattern can be purchased on ETSY or my website

The acorn bag is adorned with fall leaves on the handle and the top opens to allow you to place all of the individual forest characters inside! Plus, there's extra space for extra "friends!"

The characters are as follows:


Mr. Bunnykins

Winston Owl

Henry Hopsalot

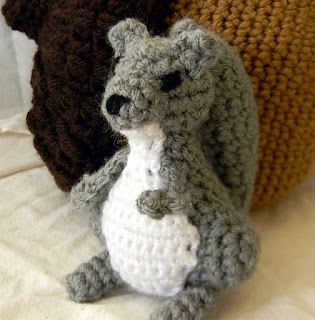
Steve the Squirrel

Gibby the Hedgehog


OR, you can have your little person name each of their own characters! This sort of imagination-based toy is perfect for little hands and minds. The bag makes this a useful busy toy for little ones to drag with them wherever they go. It also helps with their small motor skills and dexterity practicing taking the animals in and out of the bag, which all the littles seem to like to do! Last, but not least, if you make this out washable yarns, this is easy to throw in the washer to keep the toys clean and safe. While this pattern is geared toward the toddler crowd, I have seen kids as old as 7 & 8 have a good time playing with it. :)

You can use safety eyes, although the instructions in the pattern have the eyes and faces embroidered on. This pattern is definitely more geared towards an intermediate to advanced crocheter due to all of the small parts and assembly. However, it would make a great challenge for a slightly more advanced beginner. 

The only question that remains is, "What sorts of adventures will your characters go on??"

Make sure you check out my other playsets (by the way, these are all free):  Barnyard Gang Toy Bag, Fantasy Princess Castle, Iceberg Endangered Baby Animals, Rocket Ship with Astronauts & Aliens, and Tiny Pets Rescue House

© Bizzy Crochet and Design 2012

Tuesday, July 17, 2012

Slutty Brownies

Ok, I must admit, the name is silly, provocative and kinda wrong. LOL But Ohhhhhhh are they good! In reality, they are just a super easy triple layer brownie. BIG on chocolate!!!

Layer 1 is a 24 pack of preformed cookie dough rounds OR a full tube of cookie dough. I used the "Brownie Pan" from Pampered Chef, but I think you could adapt this to a regular pan easily enough.

If using the Brownie Pan, put 2 rounds per space. Otherwise layer the bottom of an 11x7 pan with the cookie dough and press down to cover the bottom. It doesn't have to be pushed hard.

Layer 2 is simply 12 Oreos. Now, in the Brownie Pan you only use one Oreo per space, so I would do the same thing in an 11x7 pan. Evenly place your Oreos for 12 brownies. You might want to lightly press them into the cookie dough to keep them from shifting during the next layer.

Layer 3 is a box of brownie mix...whatever flavor you like...mixed up according to package directions. We used the uber chunky with the Hershey's syrup etc. In the Brownie Pan just use 2 Tbl per space. In an 11x7 pan, carefully pour over or spoon over the top of your Oreo layer.

Here comes the tricky part. The Brownie Pan was 20 minutes in a 350 oven. But, I know that a brownie mix in a regular pan, all by itself, is around 25-27 minutes. You will want to feel this out. If you are doing the 11x7 pan, you may need to bake these according to the box directions for a fudgy or cake like brownie. (yes, I've made a few boxes of brownies in my life)

Good Luck!! And I hope you enjoy!!

Florida's Emerald Coast- Road Trip CAL 2025

WELCOME to  FLORIDA'S  EMERALD COAST  on this awesome Road Trip Around the World!! all pictures credit to: getwallpapers.com We're S...