
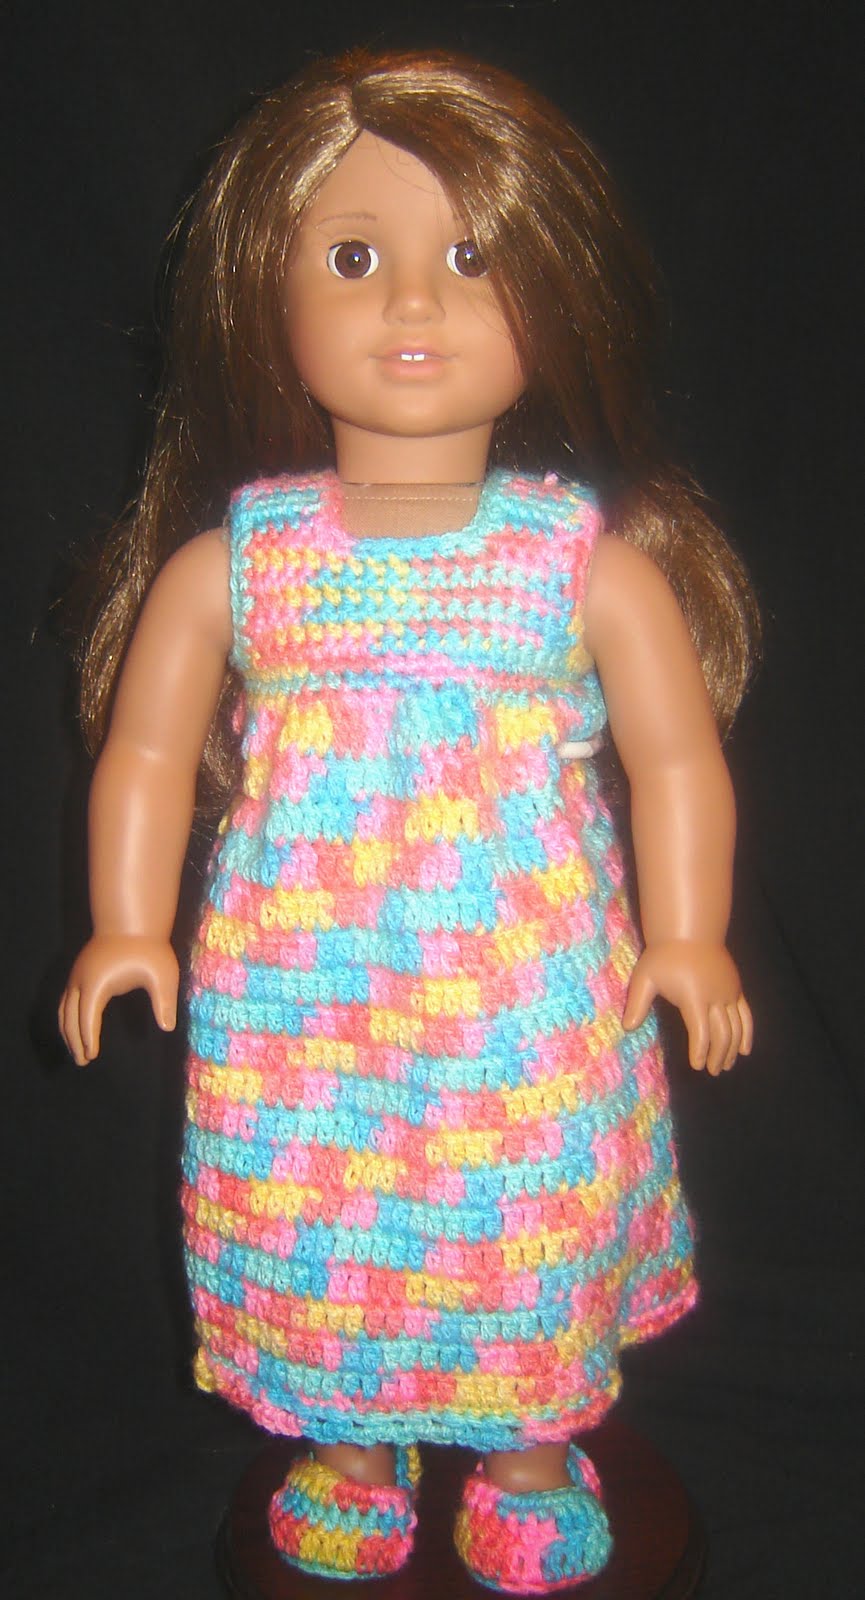
Nightie, Robe, & Slippers - 18" Doll Pattern
by Elizabeth Mareno


Materials:
5oz Bernat Softee Baby Yarn
F Hook
1- 5/8" button(preferably shank)
Yarn needle
Gauge:
18 sc/20 rows = 4"x4" square.
*note*- ch3= dc
Nightie Body:
Row 1- ch75, join with sl st to form a circle being careful not to twist, ch1, sc in each sc around. join with sl st to first sc (75)
Row 2- ch3, dc in next sc and ea sc around, join with sl st to top of ch3 (75)
Row 3-18- Repeat row 2
Row 19- ch1, sc in join, sc dec over next 2dc, (sc in next dc, sc dec) around, sc in last dc, join with sl st to first sc. (50)
Row 20-21- ch1, sc in ea st around.
End of row 21- do not join! Do NOT finish off.
Right Back:
Row 22- ch1, turn, sc in 8 sc, dec (9)
Row 23- ch1, turn, sc in ea (9)
Row 24- ch1, turn, sc in 7 sc, dec (8)
Row 25-28- ch1, turn, sc in each (8)
Row 29- ch1, turn, sc in 5 sc, leave rem 3 sc undone. (5)
Row 30-33- ch1, turn,s c in each sc,
Finish off.
Front: (wrong side facing)
Row 1- sk 5 sc, join with sl st to next sc, sc dec over next 2 sc, sc in next 17sc, sc dec (19)
Row 2- ch1, turn, sc in each sc (19)
Row 3- ch1, turn, sc dec, sc in each sc to the last 2 sc, sc dec. (17)
Row 4-6- ch1, turn, sc in each sc (17)
**Right Front**
Row 7- ch1, turn, sc in 5 sc, leave rem unfinished.
Row 8-11- ch1, turn, sc in ea sc.
Finish off
**Left Front**
Row 7- sk 7 sc on row 6, join with sc in next sc, sc in rem 4 sc. (5)
Row 8-11- ch1, turn, sc in ea sc.
Finish off.
Left Back: (wrong side facing)
Row 22- sk 5 sc on row 21, attach with sl st to next sc, sc dec in first 2 sc, sc in next 8 sc. (9)
Row 23- ch1, turn, sc in ea
Row 24- Ch1, turn, sc dec, sc in 7sc.(8)
Row 25-28- ch1, turn, sc in each sc
Row 29- ch1, turn, sl st in 4 sc, ch1, sc in same st, sc in rem 4 sc. (5)
Row 30-33- ch1, turn, sc in each sc.
Finish off.
**Sew Shoulders. Finish arm holes by joining yarn with sc in open sc on row 21. Sc in each sc and row end evenly spaced around edge.
**Finishing neckline- start in space created by back opening on row 21. Join with sc, sc in ea row end and sc around putting 2sc in ea outside corner and working a sc dec in each inside corner. Sl st to first sc.
Finish off, weave in ends.
**Button loop- Attach on left back corner w/ sl st. ch5, sl st in same st. Finish off and weave in ends.
**Sew button to opposite back corner.
**Bottom Edging- Join with sl st to any sc. ch1, sc in same st, (ch3, sk 1sc, sc in next sc), repeat around to last 3sc, ch3, sk next sc, sc in next sc, ch3, sk last sc, sl st in first sc.
Finish off, weave ends.
Robe:
RS- Row 1- ch 38, dc in 4th ch from hook, 2dc in next ch, (dc in next ch, 2dc in next ch) around to last ch, dc in last ch. (52 dc)
Row 2- ch3, turn, dc in 5dc, *2dc, (dc in 2dc, 2dc in next dc) 4 times*, dc in next 14 dc, repeat * to * once. dc in 6 dc.
** I KEEP GETTING EMAILS ABOUT ROW 2 OF THE ROBE.**
Row 2 goes like this: ch3, (this counts as a dc), turn, dc in the next 5dc. Then put 2dc in the next dc. Then work the series of stitches in the parentheses a total of 4 times. Then dc in the next 14dc, then repeat the stitches that fall between the asterisks * one more time starting with 2dc in the first stitch and repeating the series of stitches in the parentheses 4 times. Then finish by putting a dc in the last 6dc.
Left Front of Robe:
Row 1- RS- ch3, turn, dc in 9 dc (10)
Row 2+3- ch3, turn, dc in each dc. Finish off.
Back of Robe: (with right side facing)
Row 1- sk 9 dc, reattach in next dc with sl st. ch3, dc in next 23 dc. (24)
Row 2+3- Repeat left front. Finish off
Right Front of Robe:(RS facing)
Row 1- sk 9 dc, reattach with sl st in next dc. ch3, dc in next 9dc. (10)
Row 2+3- Repeat left front. Finish off.
Body of Robe:(RS facing)
Row 1- attach with sl st to bottom of left front.
sc in same st and in next 9 dc, ch5, (in row 3 of back) sc in next 24 dc, ch 5, (in row 3 of right front) sc in next 10 dc. (44)
Row 2- ch1, turn, sc in each sc and ch around.
(54)
Row 3- ch 3, turn, (dc, ch2, dc) in next sc, [sk next 2sc, (dc,ch2,dc) in next sc] across to last 3sc, sk 1 sc, (dc,ch2,dc) in next sc, dc in last sc.
Row 4- ch3, turn, dc in next dc [(dc, ch2, dc) in next ch 2 sp] across to last 2 dc, dc in next 2dc.
Row 5-10- Repeat row 4.
Row 11- ch1, turn, sc in 3dc, (2sc in ch2 sp, sc in next 2dc) across, sc in last dc. join.
DO NOT FINISH OFF
**Edging- 2sc in sm st as last sc. Evenly sp sc across row ends(2sc in dc ends and 1sc in sc ends) and rem loops from starting ch. Put 3sc in each corner, finish on bottom left corner with 2sc. Finish off.
**Ties- ch30, join with sc to top right corner of neck. sc to left corner of neck, finish with ch30.
Sleeves:
Row 1- join with sl st to bottom of sleeve opening, sc in sm st. sc around evenly for 25 sc. (sc dec in ea corner).
Row 2- ch 5, dc in sm sp, ch5 (counts as dc, ch2), [sk 2sc (dc, ch2, dc) in next] to last 3sc, join with 3rd ch of ch5.
Row 3- sl st in ch2 sp. ch5, dc in ch2 sp, (dc, ch2, dc) in each ch2 sp. join with ch 3.
Finish off.
Slippers: make 2
Row 1- ch 11, 5 dc in 4th ch, dc in next 6, 4dc in last dc, work on opp side of ch, dc in next 6 ch, join. (22dc)
Row 2- ch2, hdc in sm st, 2hdc in next 5dc, hdc in next 6 dc, 2hdc in next 4dc, hdc in 6dc, join.
Row 3- ch 3, working in FRONT loop only, dc in next 10dc, sl st in FLO of next 2.
Row 4- ch2, sk 2 sl st, hdc in each dc, sl st in BACK loop only of next 2sc.
Row 5- ch2, sk 2 sl st, hdc in each hdc, sk ch2 of last rd, sl st in FLO of next 2sc, don't cut off.
**Back Loop- Ch 10- connect on opposite side of slipper in last sc before toe and 1st hdc on last round. Finish off, weave in ends.
© Bizzy Crochet and Design 2010
.png)


Hello! I absolutely love this pattern and am hoping to make a couple of these for my girls for Christmas. :) I have a question though... on the robe on row 2 it has *2dc, (dc in 2dc,2dc in next dc) 4 times*. I'm having a hard time trying to figure that out. Do you mean that I should 2dc in the sixth stitch then dc in the 7th and 2 dc in the 8th or 9th... and then do that 4 more times?
ReplyDeleteThank you so much for posting this pattern . :)
Michelle
Hi all,
ReplyDeleteWow! The doll clothes are looking so stylish.
18 Doll Clothes
Thank you so much for sharing this wonderful pattern. It is just perfect for my granddaughters' 18" dolls!
ReplyDeleteI love this pattern so far. I have completed the body and right back, but I had a question about the front. Does it attach right to the row 21 of the body or do you make it on its own and then sew it together?
ReplyDeleteIf it attaches to row 21 of the body then where do you attach it? Thanks for your help with this very pretty pattern!
Thank you for this pattern. I needed a swimsuit cover-up to make for the granddaughters bathing suits I just made and the jacket on this will be the perfect addition. Thanks again.
ReplyDeletePlease help, I'm stuck on row 2 of the robe, just can't get it right.
ReplyDeleteThanks Jo x
Hi Jo Miah.
ReplyDeleteCan you email me at bizzycrochet (at) hotmail (dot) com? It is easier to work through pattern problems that way.
Thanks
Row 2 goes like this: ch3, (this counts as a dc), turn, dc in the next 5dc. Then put 2dc in the next dc. Then work the series of stitches in the parentheses a total of 4 times. Then dc in the next 14dc, then repeat the stitches that fall between the asterisks * one more time starting with 2dc in the first stitch and repeating the series of stitches in the parentheses 4 times. Then finish by putting a dc in the last 6dc.
ReplyDeleteThis does not make sense. "Row 29- ch1, turn, sc in 5 sc, leave rem 3 sc undone. (5)"
ReplyDeleteWhere do you line up the remained three single crochets when you stitch the Shoulders and form the arm holes?
They won't line up anywhere. If you look at the picture of the back of the nightgown, the rem three will create the corner where you attach the button.
DeleteLoving this, but I'm stuck after row 33, it says wrong side facing, and attach with a slip knot.....where do I attach after doing th Right back? At the original seam?
ReplyDeleteThanks bunches!
Wow, I love your work....i just found your site by way of allfreecrocheting. Thanks for sharing your patterns!!!! Is there a way to print your patterns?
ReplyDeleteTammy all of my patterns are available as .pdf downloads on my website www.bizzycrochet.com
DeleteTammy all of my patterns are available as .pdf downloads on my website www.bizzycrochet.com
DeleteDon't answer my question about printing....Ijust found the print button. Thanks again
ReplyDeletewould love to be able to download this pattern for my granddaughters i have 3 they would look cute in it
ReplyDeletewould love to be able to download this pattern for my granddaughters i have 3 they would look cute in it
ReplyDeletewould love to be able to download this pattern for my granddaughters i have 3 they would look cute in it
ReplyDeletewould love to be able to download this pattern for my granddaughters i have 3 they would look cute in it
ReplyDeleteWhen you refer to the wrong side, what exactly do you mean? I just finished row 33. If I hold the garment in front of me, do I skip 5 stitches starting at the round seem, or Five stitches from where I began the right back?
ReplyDeleteThank you for sharing your patterns for free and for your help.
The wrong side would be the interior of the dress. So you would count 5 stitches from where you ended the back row.
DeleteThank you. I just reread my question and I am embarrassed that I spelled seam, seem. Guess it is always best to proofread before sending. :-)
ReplyDeleteI have finished the nightie, but it looks very small around the neckline. I don't actually have a doll to try it on as it is meant for a gift. Crossing my fingers that I've done it correctly and it fits. Thanks again for your help.
Can't wait to start! 6 week camping trip, hoping to get two sets done using variegated colors. Don't like to change colors! TY for sharing! Grammy D
ReplyDeleteI found doing a SC foundation was so much easier with the longer chains to keep them from twisting. What a cute pattern, thank you! My granddaughter will love it for her doll!
ReplyDelete