Crafting Magic: Building the Walls of Your Groundkeeper's Hut! 🧱✨
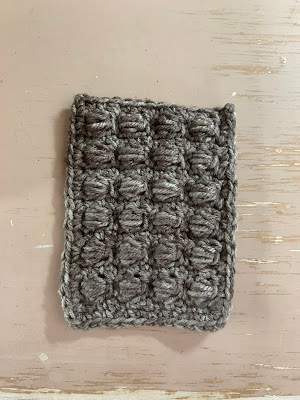
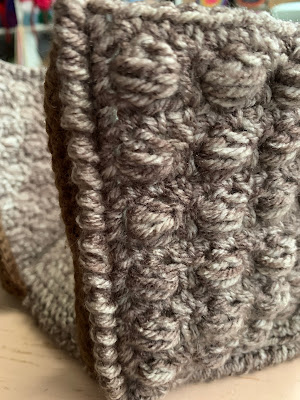
Greetings, fellow mythical creature lovers of the crochet world! Are you ready to continue our journey into the enchanting realm of the Groundkeeper's Hut pattern? In this installment, we'll be starting the construction of the walls, using a boxed bead pattern that will give our hut the appearance of rough-hewn rocks straight out of a magical tale.
As we embark on this next phase of our crochet adventure, let your imagination run wild. Picture the sturdy walls of Hagrid's humble abode, standing tall amidst the sprawling grounds of Hogwarts, beckoning you to step inside and explore its cozy interior. With each stitch, you're not just crafting a toy bag – you're creating a portal to a world of fantasy and imagination, where anything is possible.
Did you finish your base?
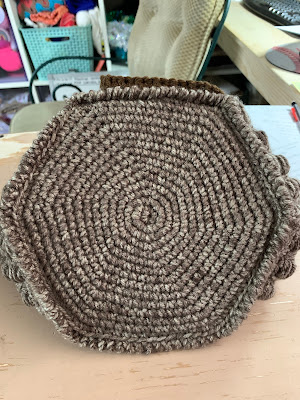
If you missed the first part of this pattern- the base- then click the picture below to be taken to the pattern. You will need to create the base before you embark on the walls. :)
A PDF upgrade is available!
And the best part of this pattern? It's absolutely free on my blog, with the option to upgrade to a downloadable PDF in US terms or UK terms for added convenience. You can choose from Ravelry, or my Website below:
Groundkeeper's Hut Crochet Pattern- Walls
Materials: includes the full list for the whole project
Yarn Supplies:
Base and walls- Worsted Weight Grey or Brown
Used: Walnut, 1 skein, I Love This Yarn Stonewashed worsted weight, 100% acrylic, (5oz / 252yds)
Door- Worsted Weight Brown
Used: Brown, 1.5 oz, I Love This Yarn worsted weight, 100% acrylic, (7oz/ 355yds)
Roof- Dark Green or Brown
Used: Dark Olive, 3 oz, I Love This Yarn worsted weight, 100% acrylic, (7oz/ 355yds)
Ironwork- DK Black
Used: Scheepjes Colour Crafter, Scrap Amount, 100% acrylic, (100g/ 300m)
Vine, Pumpkins, Mushrooms- DK Scraps
Non-Yarn Supplies:
#7/4.5mm hook
F/3.75mm hook
11” x 14” sheet of plastic canvas
Tiny bit of polyester fiberfill for the pumpkins at the end
Gauge: Worsted Weight- #7 hook- 16sc x 17rows = 4” x 4”/10cm x 10cm
DK Weight- F hook- 18sc x 22rows = 4” x 4”/10cm x 10cm
Finished Sizes:
Base- 6-1/2” to 7”
Walls- 3-1/2” W x 5” H
Overall Hut Height with Roof- approx. 12”
Notes:
- Join after each round when working in the round.
- When working in the round- Ch1 to start the next round unless otherwise noted
Special Abbreviations:
Extended Single Crochet (Exsc)- insert the hook in the space indicated, yo, pull up a loop, yo, pull through just one loop, yo, and pull through both loops on the hook.
Slanted Cluster (Slcl)- [yo, insert hook around the stem of previous dc from right to left, yo, pull loop through] 3x in the same place, yo, pull through first 6 loops on hook, yo, pull through both loops on the hook.
3rd Loop (3LO)- The horizontal bar across the back of the half double crochet stitch created by the yo.
(##) at the end of a row/round indicates the stitch count for that row/round.
US Terms:
sl st- slip stitch
Walls: Make 5
Ch 14
Row 1- (RS) sc in third ch from hook and next, *Exsc (see
special) in next ch, sc in next 2 ch; repeat from * to last ch, Exsc in last
ch, ch2, turn.
Row 2- sk first Exsc, *dc in next sc, Slcl (see special), sk
next sc, Exsc in next Exsc; repeat from * ending last Exsc in turning ch, ch2, turn.
(4 Slcl)
Row 3- sk first Exsc, *sc in Slcl, sc in next dc, Exsc in
the next Exsc; repeat from * ending last Exsc in turning ch, ch2, turn.
Repeat Rows 2 and 3 five more times. Do not cut but continue
to edge.
Edge:
First Side- working in row ends- (sc, 2sc) 6 times, sc in
the last row end, sc in the edge of the first sc from bottom (20 sc)
Bottom- ch1, sc in first sc & each ch from foundation
chain, ch1
Second side- working in row ends- sc in edge of last sc from
bottom, evenly space 19 sc up the second side. (20 sc)
**Cut two pieces of plastic canvas to fit on the interior
section of two walls. Hold aside.
Assemble the Walls:
Holding the wrong side together (with the right side facing
you), start on the bottom edge (the bottom of the wall from the edge
instructions), working left to right in the BLO of the sides- rev sc (crab
stitch) up to the top. Cut off and tuck in ends.
Put all 5 walls together before moving on.
Attach the Bottom:
Using the same rev sc (crab stitch) as the sides, you will
start on the upper right corner of the left side of the doorway opening (see
picture for placement), working in the BLO- rev sc down the side of the doorway
opening. Now grab your bottom piece.
Hold the wrong sides of the bottom and walls together. Make
sure the bottom edge of the walls is up against the bottom piece of the hut and
the right side of the walls is facing you. Working in the BLO of the walls and
bottom piece- rev sc around five edges.
Finish by putting rev sc up the right side of the doorway
opening. Cut off and weave ends.
**On the inside of the walls, attach the two pieces of
plastic canvas that you’re holding aside. From the door opening, skip one wall,
place a support, skip a wall, place a support, and then skip the last wall.


.png)


No comments:
Post a Comment