

Reaching New Heights: Crocheting the Enchanting Roof of Your Groundkeeper's Hut! 🌌🌿
Hello again, friends! Are you ready to create a roof for your Groundkeeper's Hut? .
First things first, gather your crochet hook, yarn in the color of your choice (perhaps a rustic shade reminiscent of aged thatch or weathered shingles), and plenty of stitch markers. Counting will be key in this part of the pattern, so let's make sure we have everything we need to keep track of our stitches as we work in the round.
With each stitch, envision the magical creatures and whimsical wonders that will soon call your Groundkeeper's Hut home. From unicorns to dragons, fairies to phoenixes, your enchanted hideaway will be a sanctuary for all manner of mythical beings, thanks to the sturdy roof that you're crafting with your own two hands.
And once the final round is complete, step back and admire your handiwork. You've created a rooftop that's as charming as it is functional, providing shelter and security for your magical treasures for years to come. Now, it's time to add the finishing touches and fill your hut with wonders beyond imagination.
Did you finish your Door?
If you missed the third part of this pattern- the door- then click the picture below to be taken to the pattern. You will need to create and attach the door before you create and apply your roof. :)

A PDF upgrade is available!
And the best part of this pattern? It's absolutely free on my blog, with the option to upgrade to a downloadable PDF in US terms (UK terms coming) for added convenience. You can choose from Ravelry, or my Website below:


So, grab your yarn and your crochet hook, and let's weave some magic together. The journey ahead is sure to be filled with twists and turns, but with a dash of creativity and a sprinkle of fairy dust, we'll craft a Groundkeeper's Hut that's fit for any age of mythical creature lovers.
Groundkeeper's Hut Crochet Pattern - Roof


Materials: includes the full list for the whole project
Yarn Supplies:
Base and walls- Worsted Weight Grey or Brown
Used: Walnut, 1 skein, I Love This Yarn Stonewashed worsted weight, 100% acrylic, (5oz / 252yds)
Door- Worsted Weight Brown
Used: Brown, 1.5 oz, I Love This Yarn worsted weight, 100% acrylic, (7oz/ 355yds)
Roof- Dark Green or Brown
Used: Dark Olive, 3 oz, I Love This Yarn worsted weight, 100% acrylic, (7oz/ 355yds)
Ironwork- DK Black
Used: Scheepjes Colour Crafter, Scrap Amount, 100% acrylic, (100g/ 300m)
Vine, Pumpkins, Mushrooms- DK Scraps
Non-Yarn Supplies:
#7/4.5mm hook
F/3.75mm hook
11” x 14” sheet of plastic canvas
Tiny bit of polyester fiberfill for the pumpkins at the end
Gauge: Worsted Weight- #7 hook- 16sc x 17rows = 4” x 4”/10cm x 10cm
DK Weight- F hook- 18sc x 22rows = 4” x 4”/10cm x 10cm
Finished Sizes:
Base- 6-1/2” to 7”
Walls- 3-1/2” W x 5” H
Overall Hut Height with Roof- approx. 12”
Notes:
- Join after each round when working in the round.
- When working in the round- Ch1 to start the next round unless otherwise noted
Extended Single Crochet (Exsc)- insert the hook in the space indicated, yo, pull up a loop, yo, pull through just one loop, yo, and pull through both loops on the hook.
Slanted Cluster (Slcl)- [yo, insert hook around the stem of previous dc from right to left, yo, pull loop through] 3x in the same place, yo, pull through first 6 loops on hook, yo, pull through both loops on the hook.
3rd Loop (3LO)- The horizontal bar across the back of the half double crochet stitch created by the yo.
(##) at the end of a row/round indicates the stitch count for that row/round.
US Terms:
sl st- slip stitch
Roof:
Round 1- (RS) MR, 6sc in ring. (6 sc)
Round 2- sc in each. Make sure you pop the RS out before you
continue working. (6 sc)
Round 3- sc in each. (6 sc)
Round 4- 2sc in each. (12 sc)
Round 5-6 sc in each. (12 sc)
Round 7- sc in join, Fpdc around post of st 3 rows below
(Rd4), sk sc behind fpdc, *sc in next, fpdc around post 3 rows below, sk sc
behind fpdc; repeat from * around. (6 sc, 6 fpdc)
Round 8- (2sc in sc, sc in next) around. (18 sc)
Round 9- *sc in 1, 2sc in next, fpdc around fpdc, sk st
behind fpdc; repeat from * around. (18 sc, 6 fpdc)
Round 10- sc, (2sc in next, sc in 3) around to last 3, 2sc
in next, sc in last 2. (30 sc)
Round 11- *(sc in 1, 2sc in next) twice, fpdc around fpdc,
sk st behind fpdc; repeat from * around. (36 sc, 6 fpdc)
Round 12- sc in each (42 sc)
Round 13- *sc in 6, fpdc around fpdc, sk st behind fpdc;
repeat from * around. (36 sc, 6 fpdc)
Round 14- Repeat Rd 12
Round 15- Repeat Rd 13
Round 16- Repeat Rd 12- mark this row with a stitch marker.
Round 17- *(sc in 2, 2sc in next) twice, fpdc around fpdc,
sk st behind fpdc; repeat from * around. (48 sc, 6 fpdc)
Round 18- sc in each. (54 sc)
Round 19- *(2sc in next, sc in 3) twice, fpdc around fpdc,
sk st behind fpdc; repeat from * around. (60 sc, 6 fpdc)
Round 20- sc in each. (66 sc)
Round 21- *sc in 1, 2sc in next, (sc in 3, 2sc in next)
twice, fpdc around fpdc, sk st behind fpdc; repeat from * around. (78 sc, 6 fpdc)
Round 22- sc in each. (84 sc)
Round 23- *sc in 13, fpdc around fpdc, sk st behind fpdc;
repeat from * around. (78 sc, 6 fpdc)
Round 24- sc in each (84 sc)
Round 25- *sc in 3, 2sc in next, sc in 5, 2sc in next, sc in
3, fpdc around fpdc, sk st behind fpdc; repeat from * around. (90 sc, 6 fpdc)
Round 26- sc in each. (96 sc)
Round 27- *sc in 15, fpdc around fpdc, sk st behind fpdc:
repeat from * around. (90 sc, 6 fpdc)
Round 28- sc in each. (96 sc)
Round 29- *sc in 15, fpdc around fpdc, sk st behind fpdc;
repeat from * around. (90 sc, 6 fpdc)
Round 30- sc in each. (96 sc)
Round 31- *sc in 4, 2sc in next, sc in 5, 2sc in next, sc in
4, fpdc around fpdc, sk st behind fpdc; repeat from * around. (102 sc, 6 fpdc)
Round 32- sc in each. (108 sc)
Round 33- *sc in 17, fpdc around fpdc, sk st behind fpdc;
repeat from * around. (102 sc, 6 fpdc)
Round 34- rev sc around. (108 rev sc) cut yarn and weave
ends.
Roof Inside:
Round 1- MR, 6sc in ring. (6 sc)
Round 2- 2sc in each. (12 sc)
Round 3- (sc in 1, 2sc in next) around. (18 sc)
Round 4- (sc in 2, 2sc in next) around. (24 sc)
Round 5- (sc in 3, 2sc in next) around. (30 sc)
Round 6- (sc in 4, 2sc in next) around. (36 sc)
Round 7- (sc in 5, 2sc in next) around. (42 sc)
Cut. Leave a long end for sewing. Attach to the inside of
the roof at Round 16 (marked round)
Stuff before closing completely. (the top will have a small "indentation" when you sew the inside piece into place.)
Sew the roof to the walls following the line between Rounds
33 & 34. The reverse sc border should just hang over the edge.

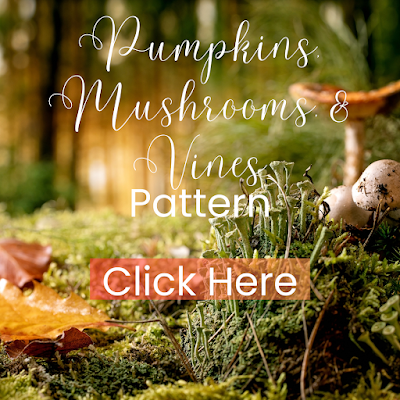
Click on the picture below to go to the Pumpkins, Mushrooms, and Vines pattern.
.png)


so pretty and nice
ReplyDelete